List of Contents
How to Install Localhost WordPress?
Easy steps to download and install WordPress on Wamp server in windows. We will share some easy steps to install WordPress on your computer.
It is basically useful when you are testing some WordPress themes or plugins.
There are many benefits of installing WordPress on localhost. It’s specially useful for WordPress developers. However, newbie bloggers may also use this method to learn basics of WordPress.
Many new bloggers feel that using WordPress is a big headache. It is true that a new person will definitely get confuse looking at so many features in WordPress. But using WordPress on your windows computer. You can easily understand all the features work in WordPress.
Today, we will try our best to describe easiest methods to install WordPress on desktop using localhost Wamp.
- Downlad and install Wamp Software
- Download WordPress latest version
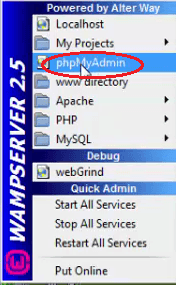
- Open Wamp from the taskbar and select phpMyAdmin
- Enter username root and leave password blank then click go
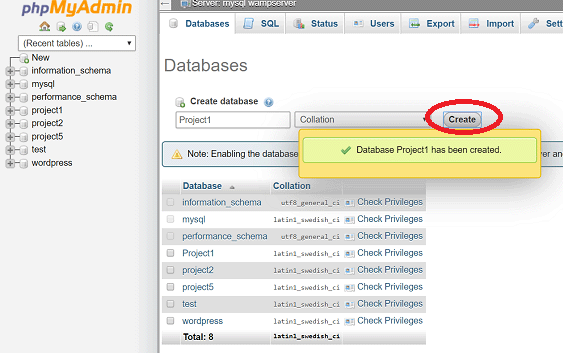
- Click Database and Create Database choose your sitename and click Create
- Here you will again fill all the information you have already set up. Such as database name, username, host.
- On next screen, you to choose your sitename, site title and password.
- Lastly, click Install WordPress and you are done.
All the above steps are so easy and you can install WordPress on Wamp in seconds.
But if you are still confuses about some specific step, you can also learn all the steps in detail below.
What is Wamp?
Basically, Wamp is a free software where you can create and test your website only for your own windows computer. Here you don’t need to buy domain name or hosting plan. You just need to download this free software then follow some steps and you can design a website on WordPress.
However, this website will only be visible to you on your windows system. If you need to go live this website to the world. You need to definitely buy some paid domain and hosting plan.
Wamp is a software where you can create and test your newly created WordPress plugins and themes. Thousands of developers use this software to test their WordPress programs.
You can also learn how to use WordPress if you are a beginner or newbie WordPress user. You can also create a new free website using WordPress.com
Also Read : How to Start a Blog to Earn $2450 Monthly with Easy Steps
Dowload Wamp and WordPress
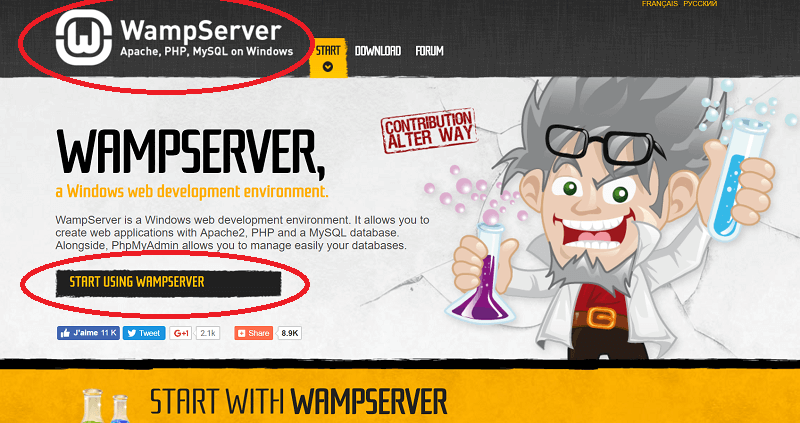
You just need to visit wampserver.com/en/ and you can download Wamp software from here easily. Or you can directly search on google to download Wamp server and you can download from many websites. If your windows is 32 bit or 64 bit, you need to choose accordingly.
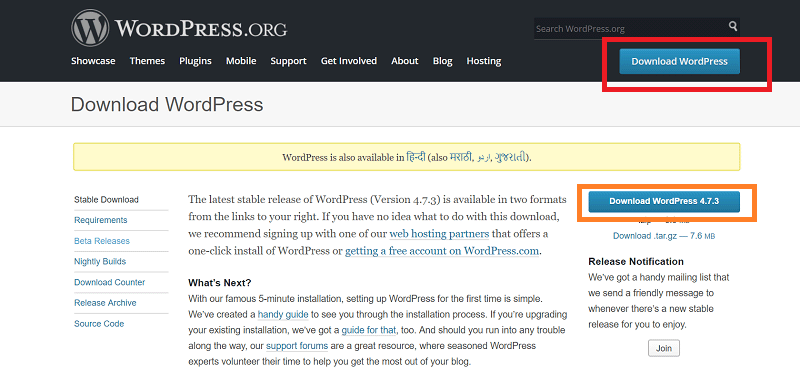
Finally you have installed the software into your computer, now go to WordPress.org and Download the WordPress. It will be downloaded in a zip file. Now you need to extract this file.
Then go to the Wamp program file folder. You can navigae them in :\C\Wamp\ here. Now copy all the files from WordPress folder and paste into this Wamp folder.
Make sure to change the name of WordPress folder because it will be your site name later. You should also first copy all WordPress into a new folder and rename that folder. And then move this folder into :\C\Wamp\ folder.
Also Read : WordPress vs Blogger. Which is Best?
How to Install WordPress on Localhost Wamp
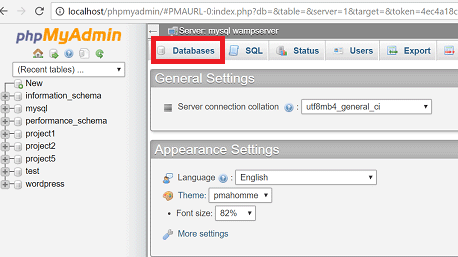
Now the files work is done. You need to go to your desktop simple click on Wamp icon. Open Wamp software. Now you will get many options there, you have to only click on phpMyAdmin.
On the next page, you will see a button database, then you will see an option creare a new database.
Now create a name of your database and click on create button.
Then you will see next page, click on next or let’s go button. Then you will get a form to fill your database, username, password and database prefix.
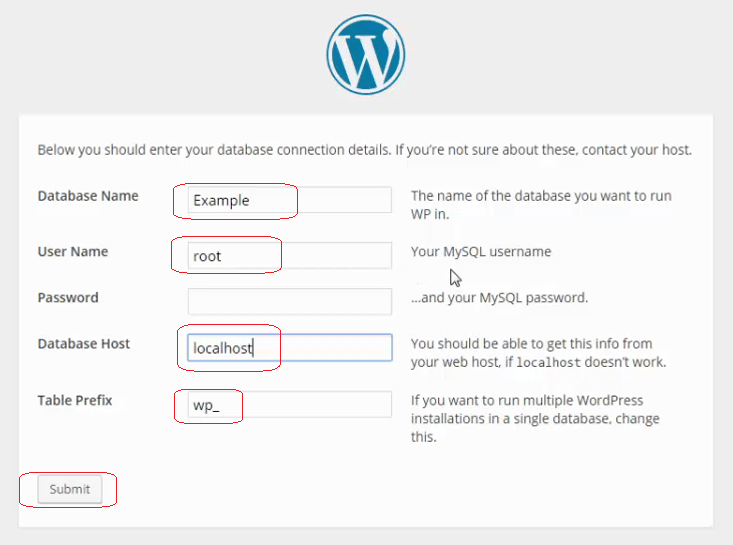
You need to enter your database name which you have just created in previous step. In the username field, you need to write ‘root’.
Now leave the password box blank. After that, in the next two boxes. They ask for database host and table prefix. Here you need to leave those boxes as it is. These settings should be default.
Finally, you can click in submit button. Now you will see a new page. Here you need to choose a site name, site title, Email address, password and privacy settings. Complete this form and click on Install WordPress.
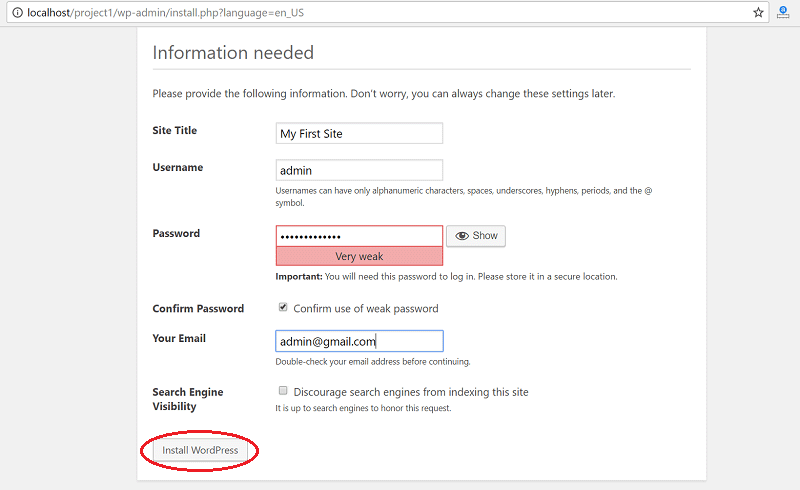
On the next page, you will see a confirmation message that wordpress has been installed and now you can access your site by simly login. You can now click on Login button to get access your site.
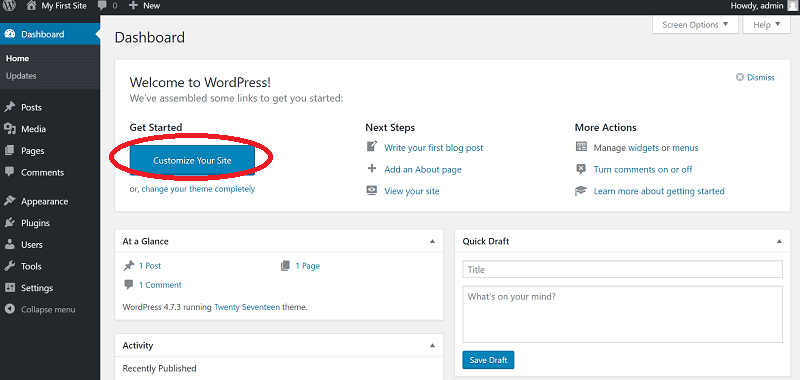
HOhoo.. Finally you have completed the process. It was a little long process but its only for once. You can now always access your site directly by entering login details.
Is is helpful to test your website on your local computer with the help of Wamp server. Now you can create or test anything on your site.
Conclusion
You can also use another software XAMP to get all the same features.
However, Wamp is the most trusted and recommended localhost server by thousands of professional bloggers and developers.
I hope with this simple and easy guide. You can easily get access your website on your local host.
If you feel helpful this article. Make sure to help others and share this post on fb and twitter as well.
Read More :


