List of Contents
A Complete Guide To Setup Yoast SEO WordPress Plugin
Do you want to learn how to use WordPress SEO plugin by Yoast? At our website, we use the WordPress SEO plugin by Yoast. This plugin is a complete solution of all your on-page SEO requirements.
In this guide, we will discuss how to install and use this plugin effectively. We will also utilize its all features and functionality.
If you are hearing SEO word for the first time. Make sure to read What is SEO and why it is Important?
What is Yoast SEO?
Yoast SEO is the most useful WordPress plugin which made SEO work so easy for blogger and website developers.
WordPress bloggers use this plugin to rank their website in google search. It makes your pages and posts SEO friendly.
Yoast SEO is extremely useful for both who are going to start a personal blog or business website.
To use this Yoast SEO plugin, you need to have a WordPress.org (self-hosted) WordPress website.
You can easily download this plugin from the WordPress plugins directory.
Yoast SEO also has premium plans to make your website more SEO friendly and to give more features and functionality.
However, it is recommended for beginners that they should only use its free version. It has enough features for a newbie blogger.
Users can easily customize there title tag, meta description, permalinks changes, adding focus keyword etc. It enables you to see SEO score of your post or page. It is recommended that SEO score should be green at that time when you are publishing the post.
Also Read : The Complete SEO checklist for Higher Rankings.
Yoast Free Version
Yoast SEO gives many features in its free version which are more than enough for any beginner. Here is the list of features the Yoast plugin include in its free plan.
- Change meta title and meta description of your each and every individual post or page.
- It shows an example, how your post will look like in Google search results.
- You can add a focus keyword of your blog post.
- Generate Robot.txt file.
- Create an XML sitemap for your website.
- Add meta tag (HTML code) of your search console and analytics
- Create a Canonical URL.
- .htaccess file editor
- Helps to verify your website with many search engines like yahoo, bing and google.
- Easily import or export all SEO settings and data from all in one SEO and headspace2 plugin.
Also Read : How to Craft a Remarkable SEO Strategy.
Yoast Premium Version
Yoast SEO provides a premium plan for advanced users. If your website or business needs more requirement. You should subscribe to this plan. Here are some additional benefits of the premium plan.
- Place 5 keywords for a single post or page.
- Easily redirect your 404 URLs.
- Yoast provides many videos tutorials to learn and use this plugin for premium customers.
- They provide premium support for the users. You can ask for any technical help related to your site’s SEO.
How to Install Yoast SEO Plugin?
Installing Yoast SEO plugin is as simple as installing any other plugin. There are two methods to install a plugin in WordPress. First is by uploading the file into plugins root folder of the website. Another way is so easy.
You just need to visit yoursite.com/wp-admin and login to your admin dashboard. Now click on plugins in the left sidebar menu. Select add new.
Then type Yoast SEO in the search box. You will first result of the plugin by Yoast SEO. Click on install button near the plugin. After installation, click activate plugin. For a more detailed guide, Also read : How to install WordPress plugins step by step guide.
After activation, you can go to the dashboard again and find an option called SEO in the left sidebar. Now Yoast SEO plugin is successfully installed and activated on your site. After this, you need to run a complete setup of the Yoast plugin. Let’s do a setup and configuration of this plugin.
Yoast SEO Configuration Wizard
You need to be careful when you are selecting configuration settings. These are settings which we use on our site.
Other SEO expert or developers may not be satisfied with our changes. They can choose their own setting according to their need.
If you are creating your website for the first time. You can use these settings same as ours. These are common for most newbie bloggers.
Also read : WordPress vs Blogger. Which is best?
1. General
As you visit the admin dashboard. You will see an option called SEO in left-sidebar.
Hover over your cursor on SEO. Select General. You will land on a new page. Here you can see three sections, dashboard features, and webmaster tools. Select the features section.
1.1. Features
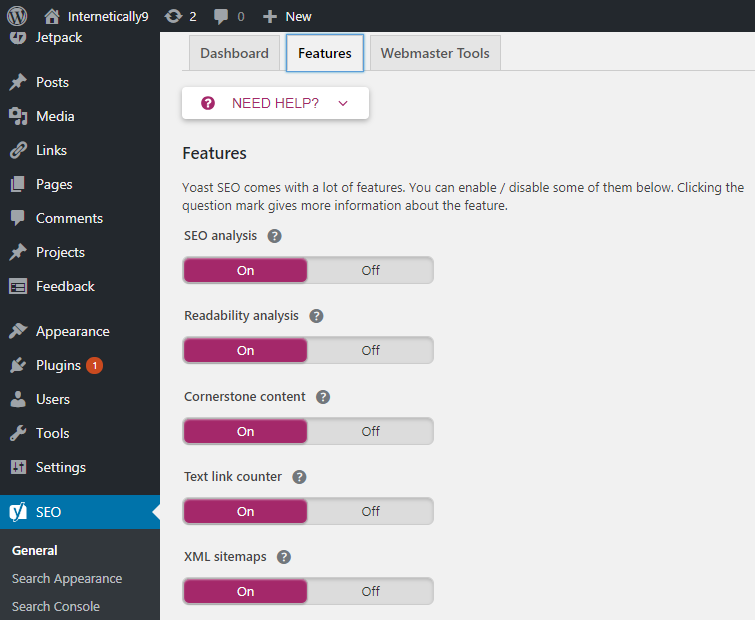
Here are many features provided by Yoast SEO. You can enable or disable every option according to your need.
Most of them, these settings are automatically perfect. You don’t need to really change these settings. If you can’t get the meaning of an option. Click on question mark sign to understand the feature.
Now click on save changes. This will save all the settings as you need.
1.2. Webmaster Tools
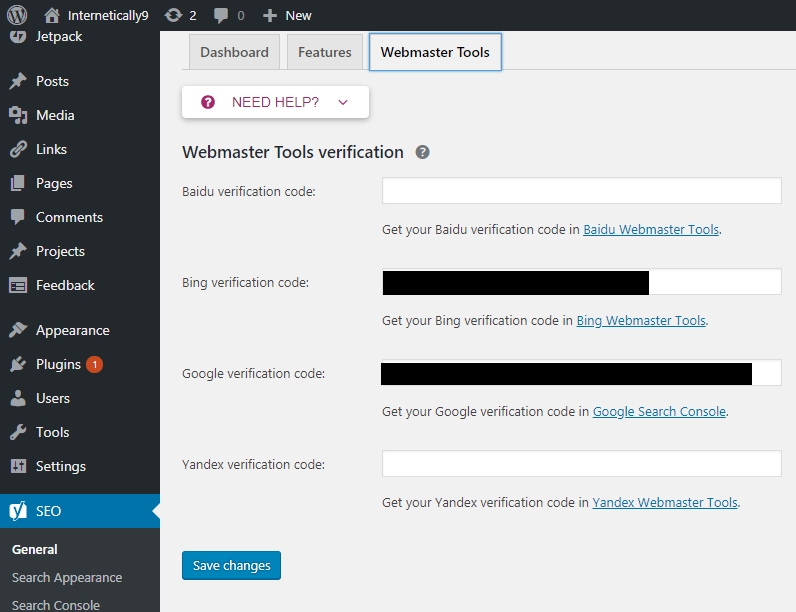
After features, next option is webmaster tools. Select this section and you will see many options like Google verification code, Bing verification code etc.
These are the sections where you can add your search console HTML code. So that your site can be indexed by that particular search engine.
This is so easy way otherwise you need to add that code in PHP files. If you still could not paste your HTML tag here. You can also read this guide to completely understand this feature. How to submit your website Google webmaster tools.
2. Search Appearance – Yoast SEO
Now again bring your cursor to the SEO on the right sidebar menu. You will see an option called search appearance exactly below the general option.
Click on search appearance. You will go to the new page. Here you can see many Yoast SEO sections. The first option is “General”. Click on it.
(a). General
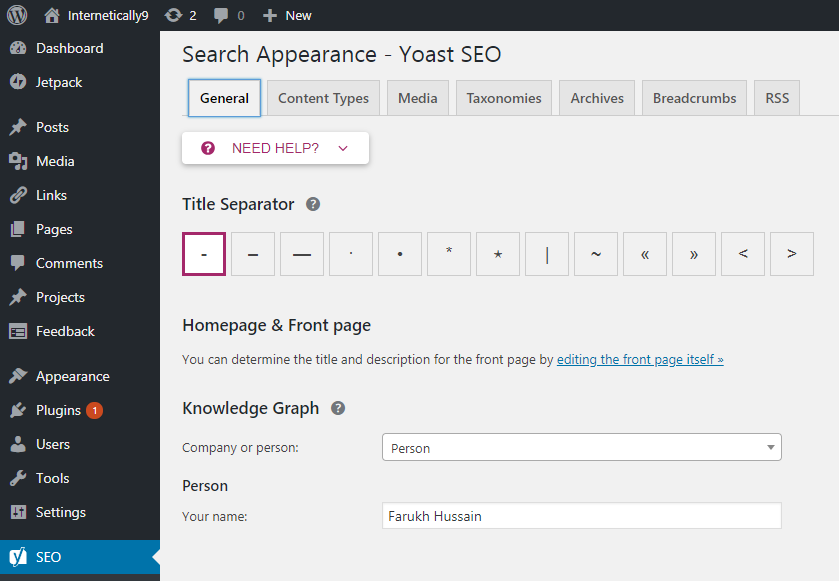
Here you can change general settings of your post appearance in google search results. You can choose any title separator whatever you like, but the first option “-” is always recommended.
The second section is the knowledge graph. This is something by which Google knows about your identity. If you are creating a company’s website, you should choose a company. Otherwise, you can choose a person.
After making changes accordingly, you need to click on save changes.
(b). Content Type
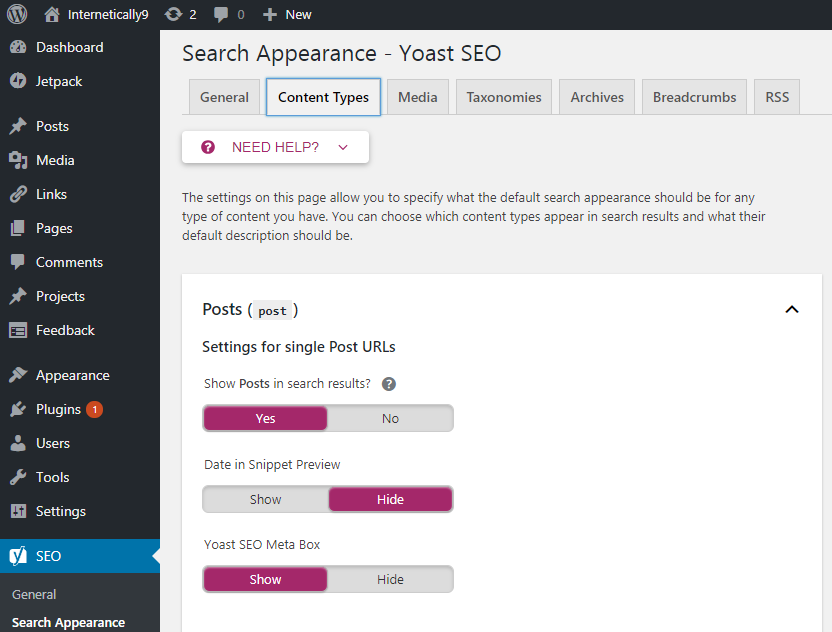
Now you will see the next section called content types. Click on this section. Here you can make changes regarding posts, pages, and projects.
Basically, this feature gives you the option to select the default search appearance of any type of content in search engines.
Here are three options you can choose from. Show posts in search results, date in snippet preview and Yoast SEO meta box.
You need to enable or disable these options. Default settings are much better for a normal blogging website. You can see screenshot for details.
(c). Media
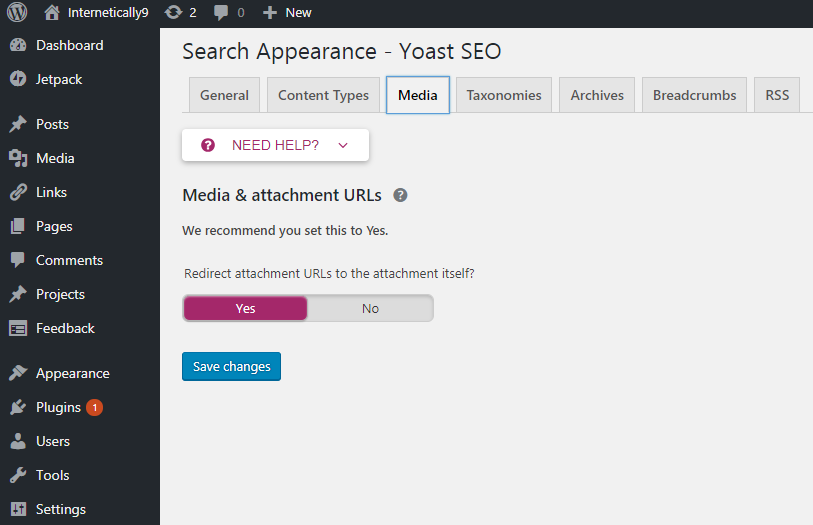
It is the next section after content types. This media feature enables to redirect your attachment URL to attachment file.
If it is hard to understand this feature. You can leave it as it is. Pro tip: If some settings are hard to understand. Leave the settings as default.
(d). Taxonomies
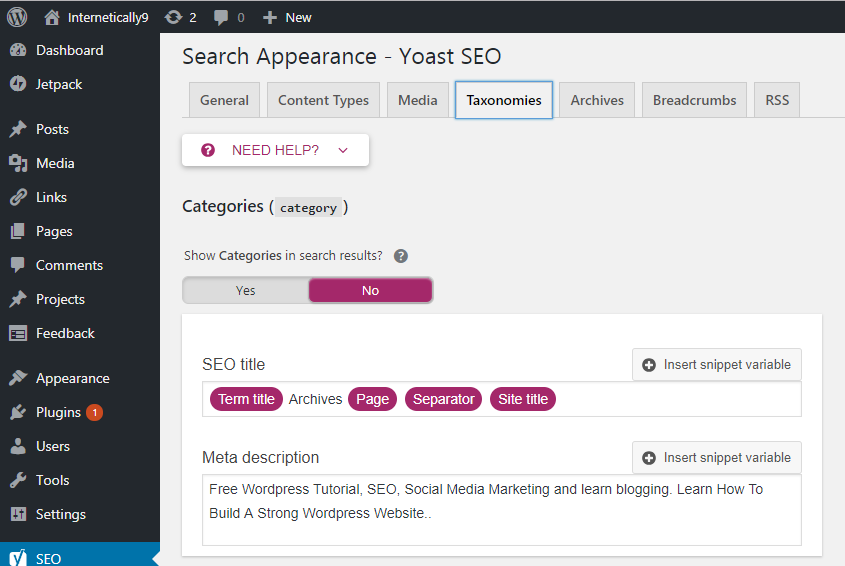
In Taxonomies section, you can configure title and meta descriptions for tags and categories. This setting is also perfect as default. You do not need to change these settings until you really know its meaning and want to change.
If you do not have set description for different terms in your categories or tags. Yoast SEO does not show meta descriptions in archives.
(e). Archives
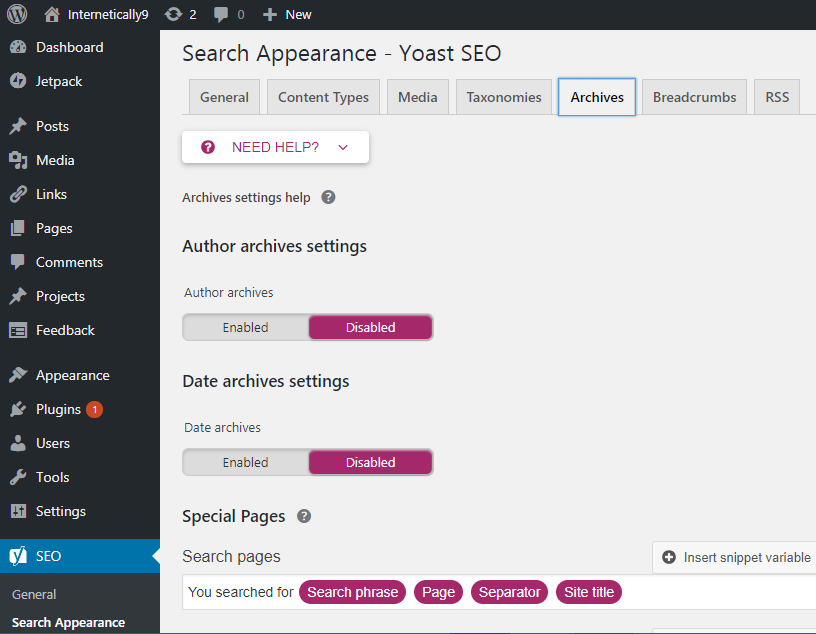
If you are the blog owner and ni other author writes on your blog, then author archive will always be same as your homepage. It is better to leave this feature to disable in this situation.
However, if you need any custom changes. You should make changes according to your need, but be careful with these sections. Unnecessary changes may occur harmful effects with the search engine.
(f). Breadcrumbs
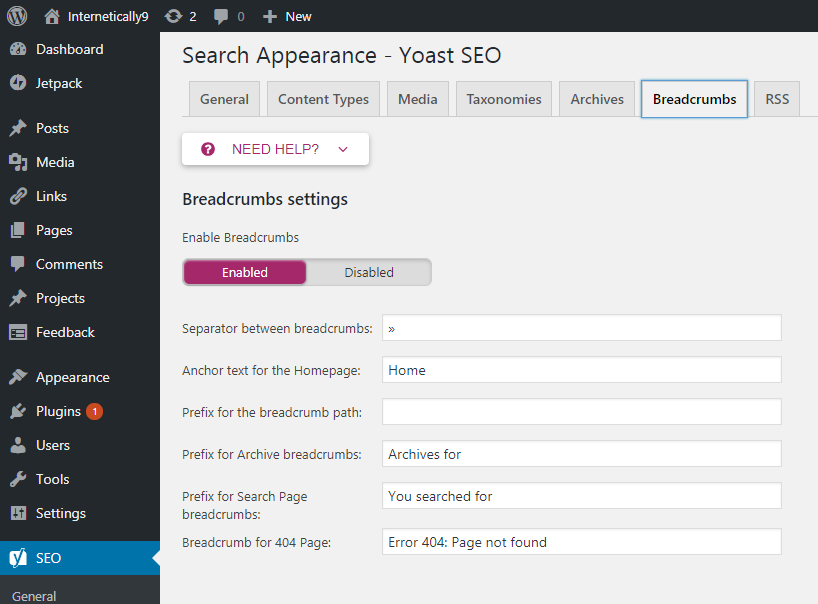
Breadcrumb is a great feature to showcase your postal address in the search results. People can know where your blog is posted on your website. It is also helpful to increase your SEO score with internal linking. It gives a right way to the crawlers to understand where your posts are listed on your site.
You should turn it enabled. It will open up some more options. Again, do not need to make any unnecessary changes. These default settings are best for every new or common blog. If you really want to change for your personal business need, then you can make the changes.
(g). RSS
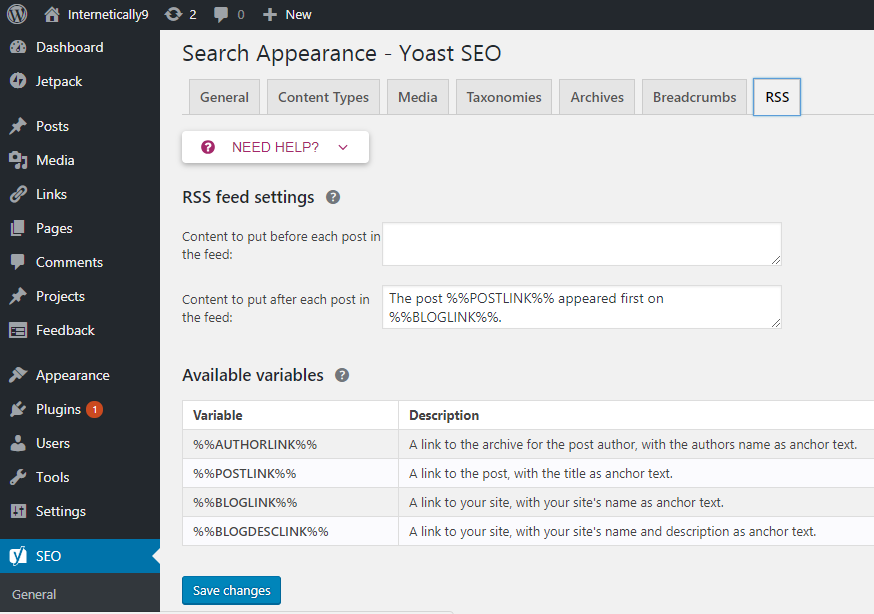
Yoast SEO created this feature for users to add a backlink to your own site for each post into your RSS feed.
Usually, RSS feeds are used by content scraper websites that stole your content for their own websites to generate revenue without your permission.
Using this feature, Google will always know that you are the original owner of this website and this is your own content.
In the RSS tab, you will see many options to change. Blog link, blog description, and post link. This is also default is best for beginners. This is the last tab in search appearance section.
Also Read : Learn the Basics of Quality Link Building for SEO
3. Search Console – Yoast SEO
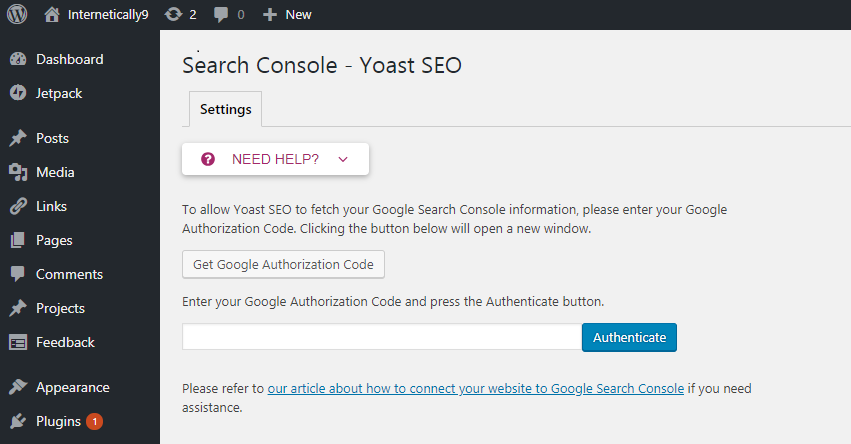
Select SEO from the options on your admin dashboard. You will get an option called search console, select it. Now you will visit a new page.
Here, you can connect Yoast SEO with your search console account. This will give you an instant information about any crawl error in your website. So, you do not need to visit again and again webmaster tools website. You can directly fetch any errors on your admin dashboard.
Here you need to add authentication code to access your webmaster account. Click on “Get Google Authorization Code” button and you will redirect to google webmaster website. Login here if it asks for the sign in. If you are already signed in, it will show you an authentication code. Copy this code and paste into the Yoast SEO plugin to complete the verification.
After the complete verification, it will ask you to select a webmaster profile. You need to select your website name there.
Now, Yoast SEO will upload your search console data into your WordPress site. You will be able to see mobile, desktop and other crawl errors with Google search engine related to your website.
If there are some pages showing 404 error. You will get a notification here to redirect that page.
4. Social
Go to the admin dashboard. Select SEO in left-sidebar and click on “social”. You will visit a new page where you will get many features to configure your social media accounts.
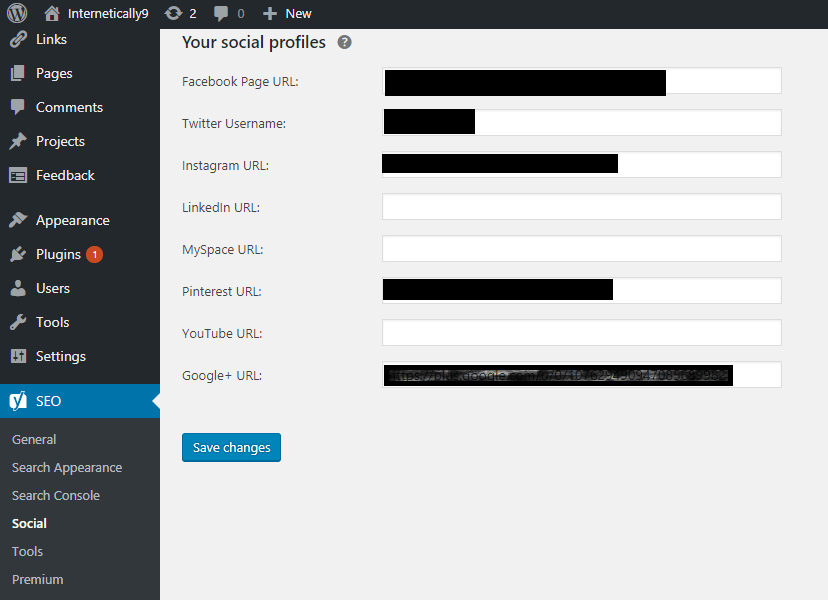
Yoast gives a special feature to connect your social media accounts with your website. In this section, there are 4 social media tabs to configure. Let’s discuss in detail.
4.1. Accounts
This is the first tab in the social media section. You need to add your social media account links. This will give access to your Social Media accounts. If you don’t have a social media account so you can leave that space blank.
Facebook, Twitter, Instagram, Pinterest, and LinkedIn are common social media platforms where you should open an account to promote your website.
4.2. Facebook
In this tab, you will see an option “Add Open Graph Meta Data“. First, enable this option.
Finally, you can fill up your facebook app id in the given space. Next, you will see another option to upload FB image URL.
This image will be shown on Facebook if there is no image in that particular blog post. Now you can click on save changes.
4.3. Twitter
First of all, enable this feature if it’s already disabled. This will generate a short preview of your post URL whenever someone shares your link in twitter. It will show your image if the post and a short description of your post.
Next, you will see an option “The default card type to use. Select here “summary with large image“. Now click on save changes and your twitter settings will be changed.
4.4.. Pinterest
Here is the settings configuration for your Pinterest account. If you are not using any Pinterest account for your site, skip this option. However, here is pro tip, some Pinterest regular users get thousands of traffic the same like Google.
Here is an option called Pinterest confirmation. You need to give here HTML code provided through Pinterest.
This will claim your website so that whenever anyone posts a picture on Pinterest from your website. Your profile picture will automatically be added with that pin.
4.5. Google+
You can add your Google+ account here to share anything on Google+. You need to add your Google+ profile URL here. Now you can easily post your blogs on Google+.
After that, you need to go to your Google+ profile and give your website URL in about section.
5. Tools
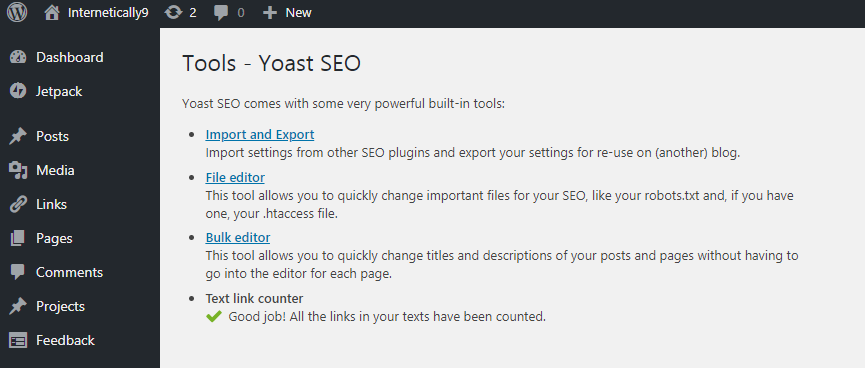
This is the most powerful tool in Yoast SEO plugin. You can easily export and import your SEO data from here. It is very beneficial when you are changing your SEO plugin or just keep your settings as a backup for future reference.
Here you can edit your robot.txt and .htaccess file to make any changes. This is a handy feature so that you don’t need to find this file in your website server.
Another classic tool is here bulk editor. Using this bulk editor, you can edit all your post’s title and description in one go. You can use this feature if you need to. Generally, beginners don’t need this feature.
So you need to be very careful when you are editing a robot.txt file. A small mistake can remove your complete site from google search engine.
6. Premium
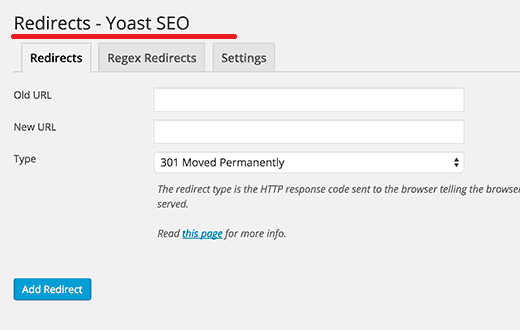
This is the feature will come when you are using the paid version of this Yoast SEO Plugin. I won’t recommend this feature for beginners and for those who just created their blog. This is the feature for advanced level users who have huge business from their website.
It’s a handy feature to fastly configure redirect on your website or blog. You can easily fix 404 error showing pages on your website. It will tell to search console that your site doesn’t have any error page.
You can also use up to 5 keywords in your blog posts with this paid plan. If you are stuck between some settings. You can get 24/7 email support from Yoast.
You can also have a look of your Facebook and Twitter post’s preview. So, this will give you an idea of your post will look like on social sites. These features only come with Yoast premium plan.
How to Use Yoast SEO with Posts and Pages?
Now, all the settings have been completed. You can use the Yoast SEO plugin every time you will write a post. The main feature of this plugin is to configure on-page SEO for each and every post.
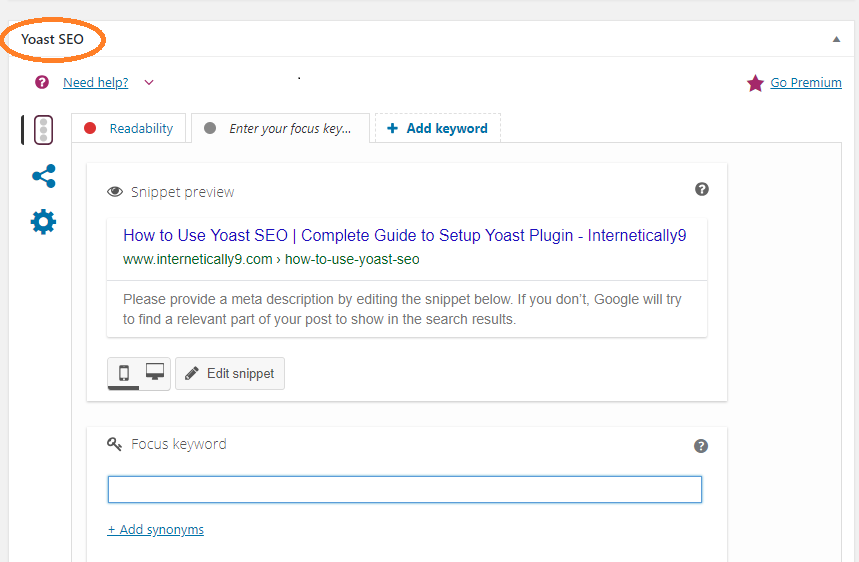
First of all, we will discuss in detail how and what is the use of Yoast SEO plugin in terms of on-page SEO. It is so easy and simple steps to follow and your post will be SEO optimized.
Go to posts and select add new. You will go to the post editor page. Just write your post or page title and just leave everything blank. Scroll down and you will see a Yoast SEO meta box exactly below the content box.
Snippet Preview
Here you will get a Snippet Preview box. It is the exact preview of how your website will be shown in the Google search results. You can edit this preview according to your keyword. It is advisable that try to add your keyword in title, slug and meta description to increase your SEO score.
You will see a tab called focus keyword. This is the main keyword on which you want to rank your article or post. You can add a specific keyword which describes the main focus of your post. This will rank your article on that particular keyword.
Now, you will scroll down and you will see another box called Analysis. This is the complete scorecard of your post SEO. Make sure to turn green light on after fixing the issues in your post. It shows you the improvements you need to do, consideration and good results of your SEO. Try to increase the good results to increase your SEO and ranking factor search results.
Readability Scores
It is another best feature to analyze your writing skills. It will indicate how a reader feels when he read your articles. It shows your sentence errors, extra long paragraphs, and grammatical errors.
Moreover, there are green bullets to show which part of your content is good for SEO while orange and red bullets indicate where you need to do some improvements. If you click on the little eye, it will showcase that section where it needs improvement and correction.
This analysis makes your article easy to read and understand. There is an overall bullet in the right side of Yoast meta box. Make sure to turn this bullet always green. If your maximum aspects are green, you will automatically get a green score.
Cornerstone Content
You can see the Cornerstone content button just below the focus keyword tab. If you will tick this button. It means that you want to rank higher that particular article. So Yoast SEO plugin will calculate your SEO score more strictly. For instance, it will tell you to increase your word length and maximize SEO. It gives some extra points to complete for better SEO.
Does Yoast SEO Work?
This is the most common question occurs in new bloggers brain. Is it beneficial to add an extra on my website? Can’t I rank my website without these extra work?
Definitely, you can rank your website without these plugins. Google always gives priority to quality content, but it uses an algorithm to identify quality content. It is not a human who can understand that your content is really helpful for the community.
Google uses multiple factors to identify the best content on the world wide web and Yoast SEO covers most of those factors in a single plugin. So you don’t need to go here and there to optimize your content. They give you all the features in one place.
Definitely, this plugin is so useful in terms of SEO optimization. You can get an idea that why millions of industry experts using Yoast SEO to optimize their website.
Conclusion
As a result, It is not easy to configure your post with best SEO practices but Yoast SEO WordPress plugin makes this tough task easy.
Thousands of WordPress users use Yoast SEO plugin to optimize their content SEO friendly.
This will not only increase your chances to rank higher but also make sure to create easy to read articles.
Finally, we have completed this huge guide on How to Use Yoast SEO WordPress plugin.
I hope that you feel this article helpful for beginners and advanced users as well. Keep remembering that doesn’t make those changes which are out of your mind. It may cause bad SEO effects on your website.
Read More :
How to Make Money with Google Adsense.


So much reliable information! I need to use this plug-in to up my blog.
I always recommend Yoast to everyone that has a wordpress website. This is a great guide for those who don’t have any idea how to use Yoast.
as I’m learning more about blogging, I’ll definitely be referring to this – thanks!